As I look forward into the next couple of months I realize how down to the wire we are. I start seeing my doctor every 2 weeks now. On top of that I am getting dental work done in the month of May so I will be seeing the inside of a doctors office more often that I would like to admit now, lol! And then after I get all of that done we will be in June. June means CRUNCH TIME!
At this point I have between 8 and 11 weeks before I deliver. The 11 week mark is my actual due date but the 8 week mark is about when I had the girls and Bubby was right in between. I can't believe that the end is this close! It also makes me realize how much I have left to do before baby D is born.
~I need to get our bedroom ready, as it will be her bedroom too for a while.
~I need to figure out if we are going to try nursing again or if I am going to go straight to formula with her. ~I need to get meals prepped and frozen for us.
~I need to find childcare for our kids so when I go into labor that my kids have somewhere to go before my parents or Hubby's family can get down here.
~I need to find baby clothes for her, we have lots in the bigger sizes (say 3 months plus) but my kids stayed in premie/newborn sizes forever and I have very few things in those sizes.
There is so much to do right now but I know that with my Hubby's help that we can get it done.
This weekend we are getting dirt from Hubby's dad for our 4 raised bed gardens. Oh that reminds me, we are also planting 4 raised bed gardens this year...lol. I have my seedlings started in the basement and it is about time to transplant them into their peet pots...perhaps I will do that this week. :) I feel another blog post coming on! :)
Maybe today I will chop up some ham and make some more potato soup (since the dog helped herself to our leftovers last night) and whip up some taco meat to freeze as well. That would be a pretty easy thing for me to do today. And since my niece is visiting she can help me with the kids so that I can get a few more things done.
Hope you are all having a fabulous week!
<3 Alison
Wednesday, April 27, 2011


Monday, April 25, 2011
Holiday Leftovers!
This is one of my favorite topics after a holiday. The Leftovers! I will often buy a ham or turkey that is much to large for our family (even with extended family over) to eat in a meal. But I do it on purpose. I like to have lots of leftover ham and turkey. I can make things like turkey tettrazini or turkey pot pie or ham and potato soup or ham and bean soup! I can even freeze chopped up pieces so that I can use it in omelets!
This year I am going to be making some ham and bean soup with some navy beans and the ham bone left over from Saturday's dinner. I will then take some of the leftover ham and make up some ham and potato soup. I will be able to get one night's dinner out of it as well as one to freeze so I will have 2 more meals in my freezer stash for when Baby D is born. :) YAY!
Here are the recipes that I am going to be using for my soups today. :)
Number of Servings: 8
This year I am going to be making some ham and bean soup with some navy beans and the ham bone left over from Saturday's dinner. I will then take some of the leftover ham and make up some ham and potato soup. I will be able to get one night's dinner out of it as well as one to freeze so I will have 2 more meals in my freezer stash for when Baby D is born. :) YAY!
Here are the recipes that I am going to be using for my soups today. :)
Ham & Bean Soup
1 1/4 c small dried white beans (I did an overnight soak with mine, check the package for other instructions)
7 c cold water (I am using 5 c chicken broth and 2 c water)
1 ham bone
1/2 c diced ham (optional)
1 large onion, diced
3 celery stalks, diced
1 large potato, peeled & diced small
2 cloves garlic, minced
1/2 t dried thyme (I would have preferred fresh but mine had gone bad.)
salt & pepper
Place the beans, water & ham bone into a large soup pot & bring to a boil. Reduce heat & simmer until the beans are tender about 1 1/2 hours.
Remove the ham bone. Cut any meat remaining on it off & dice it. Return the meat to the pot.
Add the diced ham, onion, celery, potato, & thyme to the pot. Salt & pepper to taste.
Simmer until the potatoes are soft, about 30 minutes.
Use a potato masher to gentle mash the soup until it is a little creamy.
Serve with crusty bread.
Creamy Potato and Ham Soup
Ingredients
- * Nonstick cooking spray
* 1 small onion, chopped
* 1 clove garlic, cut in half
* 3.5 cups chicken broth
* 2 lbs potatoes, peeled and chopped
- * 1 cup ham, chopped* 1 cup skim milk
* 1/2 tsp salt
* 1/4 cup shredded fat free cheddar cheese
Directions
* Coat a large pot with cooking spray and set it over medium heat. When the pot is hot, add the onion and the garlic and cook, stirring occasionally, until the onion is soft but not brown, 5-6 minutes. (Be careful not to burn the garlic!)
* Add the broth, ham, and potatoes and bring to a boil. Reduce the heat and simmer, partially covered, until the potatoes are tender, 20-25 minutes.
* Carefully use a potatoe masher to get soup to desired consistency. You can also use a blender. Add milk and salt; mash/puree until smooth. Ladle into bowls and sprinkle with cheese.
*We will also serve with croutons for an extra crunch. It also stretches the soup a bit. This is a very filling soup. :)
* Add the broth, ham, and potatoes and bring to a boil. Reduce the heat and simmer, partially covered, until the potatoes are tender, 20-25 minutes.
* Carefully use a potatoe masher to get soup to desired consistency. You can also use a blender. Add milk and salt; mash/puree until smooth. Ladle into bowls and sprinkle with cheese.
*We will also serve with croutons for an extra crunch. It also stretches the soup a bit. This is a very filling soup. :)
Number of Servings: 8
Hope you enjoy these recipes!
<3 Alison
Friday, April 22, 2011
Egg Shaped Chalk
Sorry for the double post today, don't get used to it! lol!
I am making these fabulous "treasures" for my kids' Easter baskets. Here is the recipe and directions.


I am making these fabulous "treasures" for my kids' Easter baskets. Here is the recipe and directions.
Egg Shaped Sidewalk Chalk
These were so easy to make. You will need:
- Plaster of Paris
- Tempera Paint
- Petroleum Jelly
- plastic Easter eggs
- disposable cups
- disposable spoons or wooden craft sticks
- egg carton

Take petroleum jelly and liberally coat the insides of the eggs and then place in the egg carton. Mix 1/2 cup Plaster of Paris with 1/4 cup water and stir well. Mix in enough liquid tempera paint to get your desired color. We added about a teaspoon or so. You can also use powdered tempera paint (start with about 1 tablespoon and go from there). We mixed up a blue batch, poured it into the eggs then immediatley mixed up a pink batch.

Pour mixture into egg halves. This amount makes about 1 1/2 eggs. We used the 1/2 to make two colored eggs. DO NOT pour extra plaster down your sink drain --I tell you this is a no no. Throw it in the trash!
Allow this mixture to set about 5 minutes---just until thick enough to put the egg halves together. Once together, hold tightly and carefully give egg a good shake and a firm tap on a hard surface to allow plaster to form to the egg and the halves to come together.

Allow eggs to harden overnight. We couldn't wait (patience issues) and rushed ours allowing only about 3 hours (this is overnight in child time isn't it?) to dry. To remove them from the plastic an adult must use a knife to work the halves apart.
This is a VERY messy project. I do not recommend having the kids help unless you want plaster of paris everywhere...lol. :) Remember, DO NOT WASH THIS DOWN THE SINK! Use disposable things you can throw away after you are done with this project.
Have fun!
<3 Alison
Bunny Cake and Good Friday
I got my Bunny Cake done! YAY! Well, it is mostly done. We are still looking for the string style licorice. Not sure where else to look for it. We looked at the local grocery and the Dollar General store. Perhaps I should just head to the gas stations and take a look. They sometimes have the obscure things that you can't find anywhere else...lol.
It was super easy to do and I really don't think anyone could mess this one up. I totally recommend making this cake. Here is the finished product of what I made (minus the whiskers and mouth: aka: string style licorice).

It was super easy to do and I really don't think anyone could mess this one up. I totally recommend making this cake. Here is the finished product of what I made (minus the whiskers and mouth: aka: string style licorice).

I left the extra coconut around the bunny to give him a softer look. The girls thought he "looks BEAUTIFUL!" I used green Dots for the eyes, a pink M&M for the nose, twizzlers for the outline of the bowtie and jelly belly's for the decoration on the bowtie. :)
The only thing to remember when making this cake is that it is frosted with whipped cream. If you make it a day a head of time you will HAVE to refrigerate it. I found out that this is the BIGGEST thing I can put in my fridge. Anything wider or longer would NOT fit, lol! Live and learn right?
Now to finish getting things ready for my sister to get here. YAY! I am so excited that she is coming to stay with us. :) She hasn't seen my new house yet and I haven't seen her since Christmas. Yippeeeeee! :D
Yes, I made a cute bunny cake and I am making lots of other cute stuff for Easter but let's try and remember for a moment what happened today. Tonight we will be attending our church's Good Friday service.
Today is Good Friday. Today is the day that Christ was crucified. He was hung on a cross and died. He died for your sins and mine. Without this selfless deed I would not be worthy to enter Heaven to live with him. Because of Christ I am able to be forgiven of my sins. I am able to talk to my Heavenly Father daily and repent of my sins. I know that I am not a perfect person. I know that I mess up. But I also know that if I truly am sorry for what I have done and I repent of those sins that God will wash away those sins and give me another try, even though I don't deserve it. THANK YOU FOR YOUR GIFT TO ME, TO ALL OF US, JESUS!
<3 Alison
Thursday, April 21, 2011
Egg-stravaganza!
Today is Egg Day in our house! :)
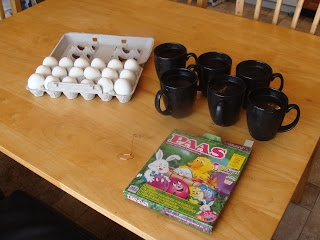
I hard boiled 18 eggs yesterday and set them in the refrigerator until I could get to them. Today sounds like a good day to do it so we dyed eggs today. :) YAY!
Here are a couple pics of that. :)


I ventured out to make Hidden Surprise Easter Eggs but they didn't turn out that way. I ended up with Egg Shaped Treats instead. I think I should have used a BIGGER egg than what I had on hand. You live and learn right? They are still cute and still quite tasty. The girls like the little chocolate surprise of an M&M on the outside. :) Do note that you MUST work quickly or the rice krispie mixture will harden on you!
Here is the link to the recipe.
After all that is done I will be making a Bunny Cake. I baked the cake while the kids watched some PBS and then after they go to bed I will decorate it. I can't wait to get started on that project! I will be chilling the cake tonight so tomorrow I will be able to frost and decorate the cake for our Easter lunch/dinner on Saturday. :) Yipee!
I am using my Classic White Cake Recipe from foodnetwork.com. This is where you can find the recipe. I have used this white cake recipe for almost all the other white cakes I have posted here on the blog. :)
I have lots of family coming in starting tomorrow so I am not sure if I will be posting the Bunny Cake tomorrow or if I will post it on Monday. It all depends on how fast they get here. :) Here's to hoping their drive is short and eventless. :)

I hard boiled 18 eggs yesterday and set them in the refrigerator until I could get to them. Today sounds like a good day to do it so we dyed eggs today. :) YAY!
Here are a couple pics of that. :)


I ventured out to make Hidden Surprise Easter Eggs but they didn't turn out that way. I ended up with Egg Shaped Treats instead. I think I should have used a BIGGER egg than what I had on hand. You live and learn right? They are still cute and still quite tasty. The girls like the little chocolate surprise of an M&M on the outside. :) Do note that you MUST work quickly or the rice krispie mixture will harden on you!
Here is the link to the recipe.
After all that is done I will be making a Bunny Cake. I baked the cake while the kids watched some PBS and then after they go to bed I will decorate it. I can't wait to get started on that project! I will be chilling the cake tonight so tomorrow I will be able to frost and decorate the cake for our Easter lunch/dinner on Saturday. :) Yipee!
I am using my Classic White Cake Recipe from foodnetwork.com. This is where you can find the recipe. I have used this white cake recipe for almost all the other white cakes I have posted here on the blog. :)
I have lots of family coming in starting tomorrow so I am not sure if I will be posting the Bunny Cake tomorrow or if I will post it on Monday. It all depends on how fast they get here. :) Here's to hoping their drive is short and eventless. :)
Wednesday, April 20, 2011
My coupon binder!
Who knew that one day I would write an entire post on my coupon binder...lol! But since I have been asked on more than one occasion in the last week about my coupon binder I thought I would do a post on it and let you peek into my binder. :)
First things first...I did not come up with these nifty dividers on my own...lol. Someone sent me over to thekrazycouponlady.com and I found the pages there and printed them all off. There are some 40 pages to print but totally worth it when you get to organizing your coupons. Here is a quick link for you all to follow to find the fabulous dividers that I did. :) PLEASE go and read her entries on beginning couponing and watch any clips she has taken. I found her site to be SO helpful!
Another great site that I have found is coupondivas.com. They match up coupons with the sales that are out there at MANY stores. They even have stores from MY neck of the woods (aka; NOWHERESVILLE)! So now when I am planning a trip to town I check out all the match-ups to see what I have.
It is VERY important that you learn the "lingo" that they couponing sites use. Both of the above sites have a glossary/lingo part of their page so that you can easily learn what they are talking about. At first it looks like gibberish but soon it will become second hand and when you are writing your list out you will find yourself using it as well!
OK, without further adieu, here are the pictures of my binder with some short explanations. Most of them are self explanatory though. :)

My stack of coupons this week!

Baseball card holders, how I organize my coupons.

The Binder!

Even has a place for pens!

The Table of Contents

Divider #1

Baseball card holder in action!
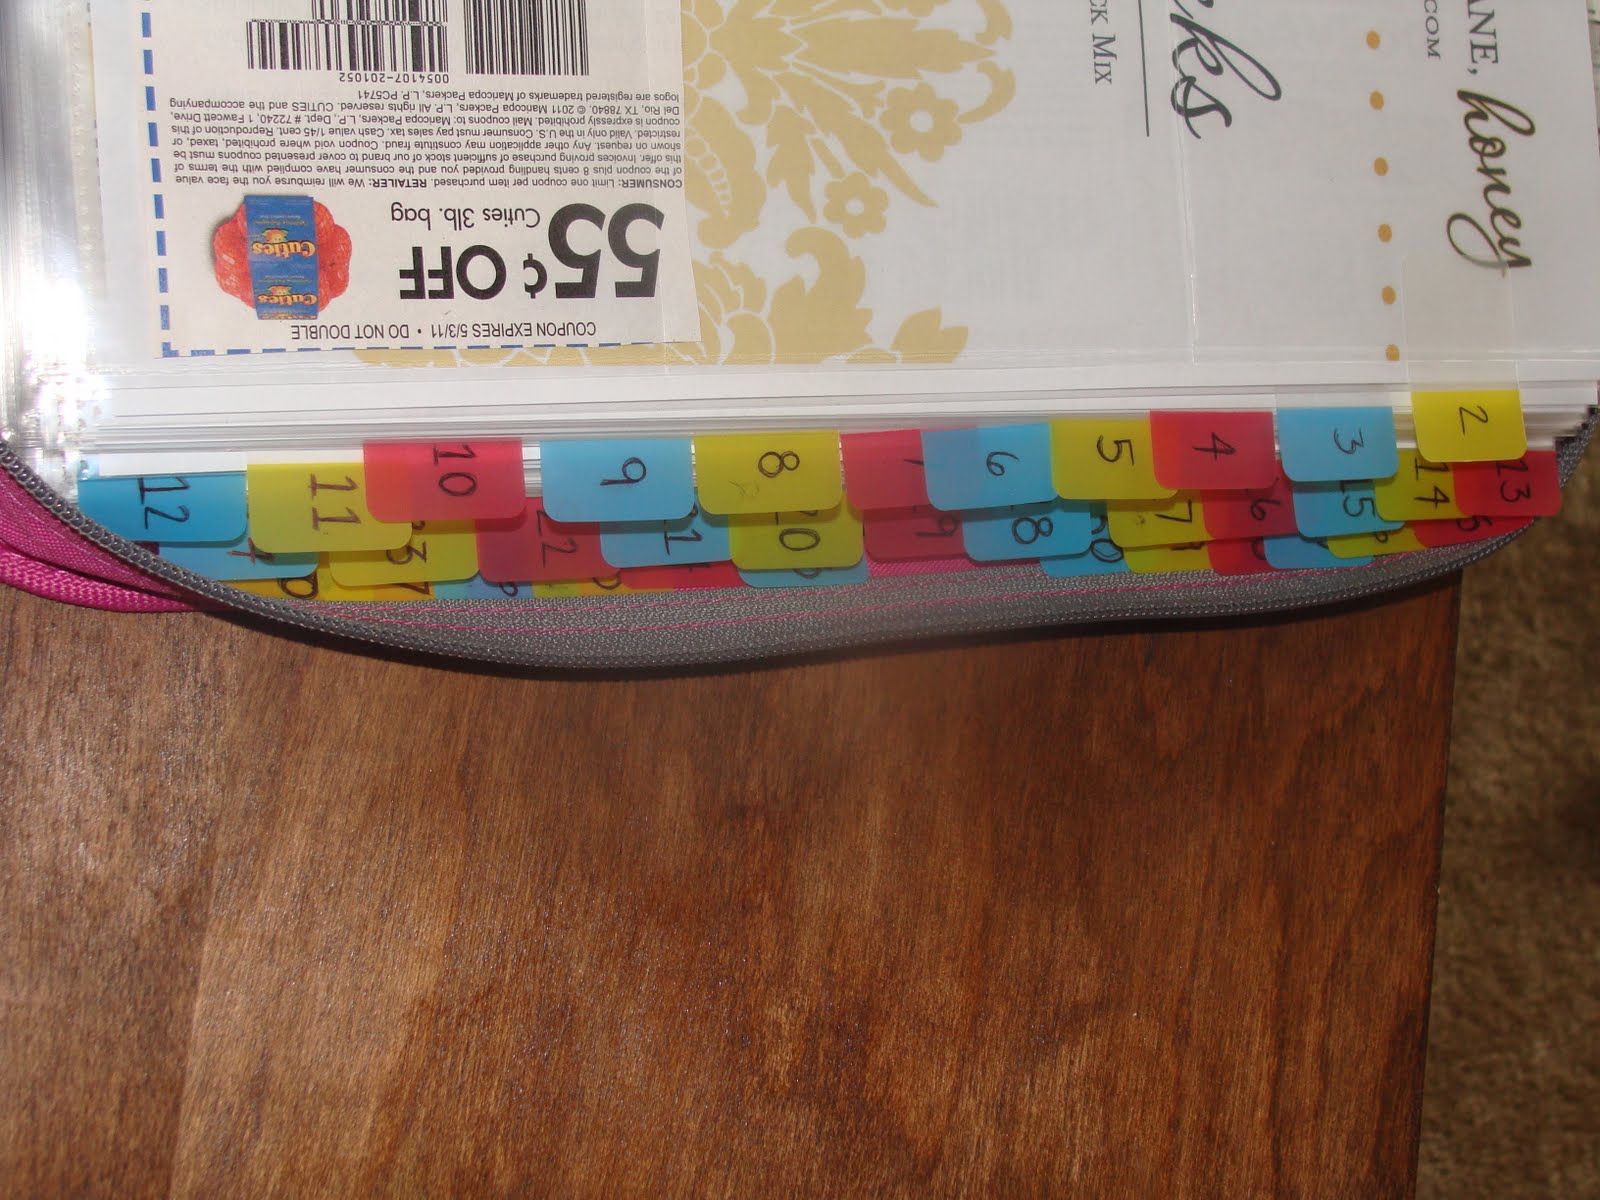
I used tabs on each divder so I can quickly find what section I am looking for.
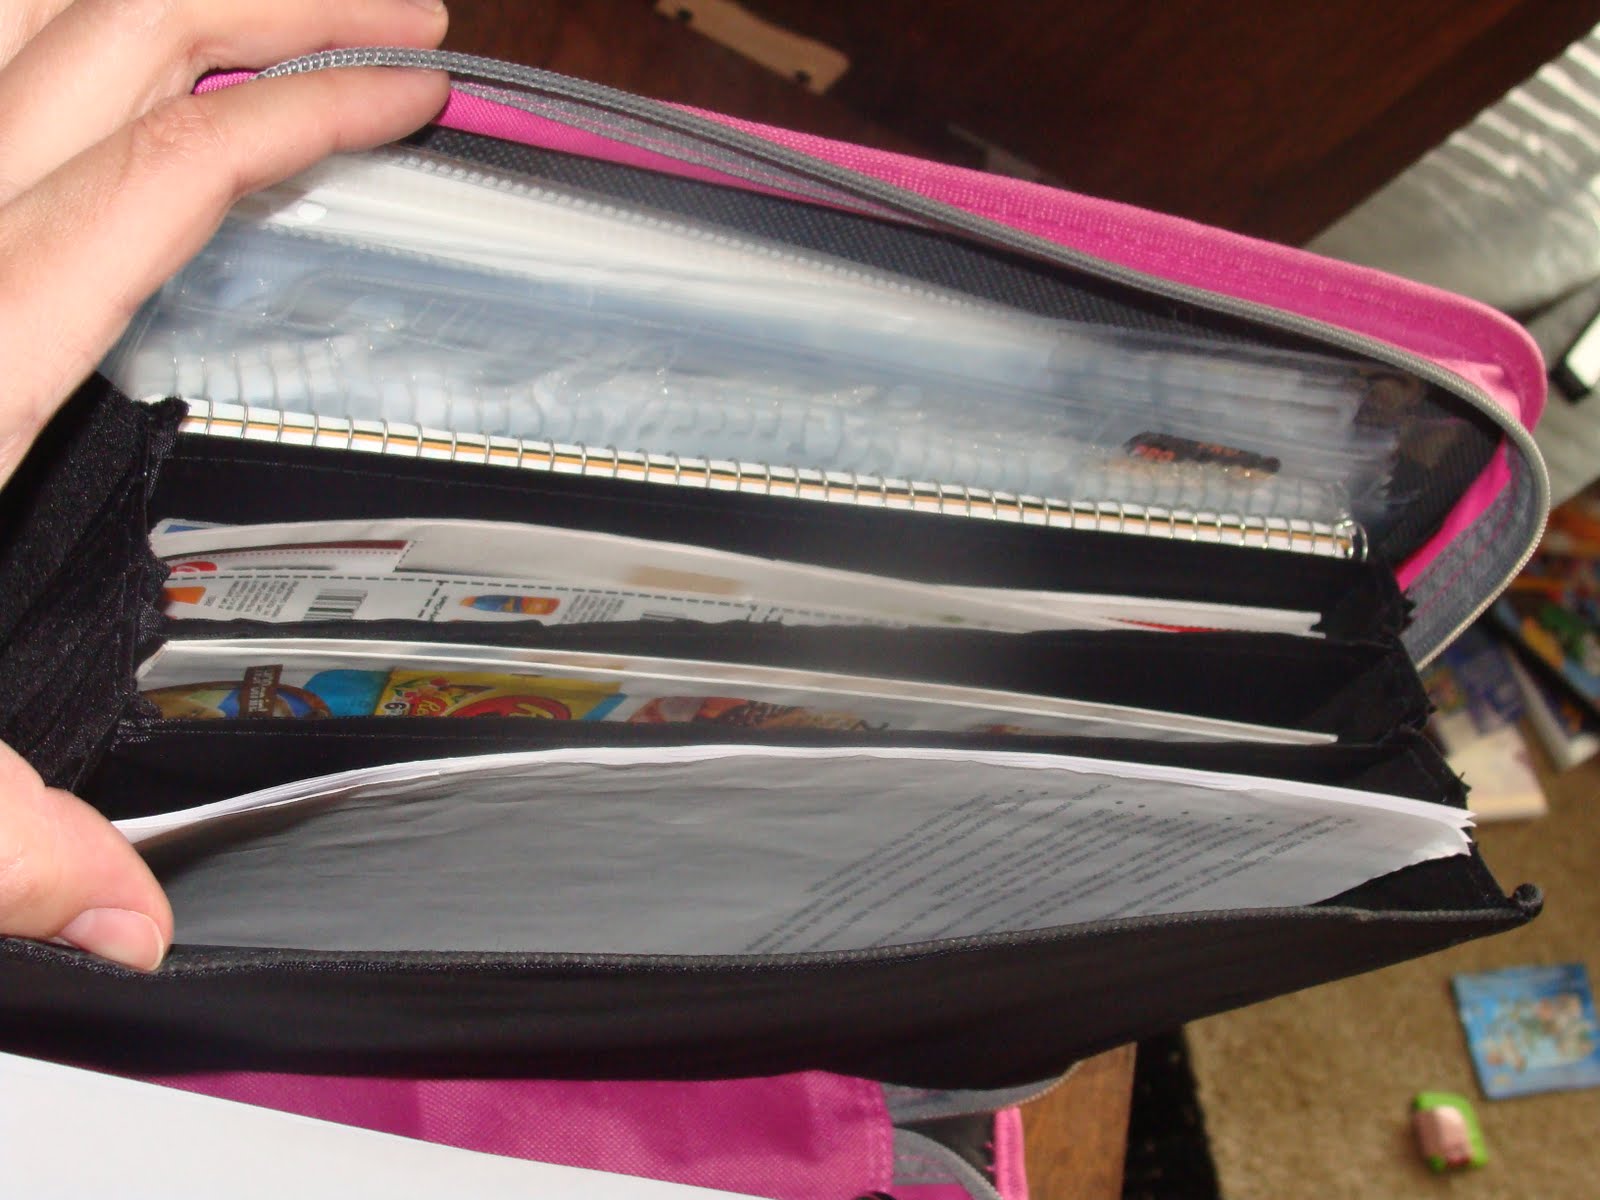
There is even a little file folder part so I can keep extra baseball card holders, a notebook, in store ads, coupons I haven't clipped yet, and store policies very handy!
I hope that seeing my coupon binder is helpful! Let me know if you have any more questions about it and I will be glad to answer!
<3 Alison
Monday, April 18, 2011
Easter Preparations and Baby D recipe!
I am so excited! I am finally have the ability to HOST a family holiday! YAY! I am so excited I can't even tell you. So this week will be filled with preparations. I need to make food, clean and organize things in the house. My mom and dad, sister and niece, and grandmother are all coming for an Easter dinner on Saturday! YAY! My parents and my grandma are all staying at a local hotel so we can all go to church together at our church on Sunday! WOOOHOOOO!
Our menu for our Easter dinner is as follows:
Brown Sugar Ham
Lettuce Salad
Dinner Rolls
Strawberry Fluff
Corn Casserole
Mashed Potatoes
Dessert (to be determined what yet...lol)
I am going to be making some Rice Krispie Treat eggs with M&M's in them and already have those Bird's Nests made. I found on another blog that I follow an idea for a Easter Basket Scavenger Hunt and we will be doing that. When I get around to prepping for that I will link up with the other site and share that with you as well. :)
Along with getting things ready for Easter I am going to be preparing some meals for Baby D's arrival. Today I am going to be making an egg dish, Gabriel's Eggs. It is definitely a family favorite. Here is that recipe.
Gabriel's Eggs
1 loaf sourdough bread
1lb bulk sausage (we like Jimmy Dean's sage flavored the best)
8oz shredded cheese (we like cheddar but any flavor works)
4 eggs
2 1/4 c milk
1 can cream of mushroom soup
Brown sausage, drain and set aside. While sausage is browning tear the loaf of bread into bite size pieces and place in a GREASED 9x13 pan. In a bowl, mix milk and eggs together.
Top the bread with the browned sausage. Then add the shredded cheese. Pour the egg/milk mixture over top. Add the cream of mushroom soup on top (I use a bit more milk to make the soup a bit thinner so it spreads easier).
Bake at 350 for 45 minutes to 1 hour. The edges will be bubbly when it is finished.
From Frozen: Thaw first then bake as directed above.
I hope you enjoy this recipe as much as we do!
<3 Alison
Our menu for our Easter dinner is as follows:
Brown Sugar Ham
Lettuce Salad
Dinner Rolls
Strawberry Fluff
Corn Casserole
Mashed Potatoes
Dessert (to be determined what yet...lol)
I am going to be making some Rice Krispie Treat eggs with M&M's in them and already have those Bird's Nests made. I found on another blog that I follow an idea for a Easter Basket Scavenger Hunt and we will be doing that. When I get around to prepping for that I will link up with the other site and share that with you as well. :)
Along with getting things ready for Easter I am going to be preparing some meals for Baby D's arrival. Today I am going to be making an egg dish, Gabriel's Eggs. It is definitely a family favorite. Here is that recipe.
Gabriel's Eggs
1 loaf sourdough bread
1lb bulk sausage (we like Jimmy Dean's sage flavored the best)
8oz shredded cheese (we like cheddar but any flavor works)
4 eggs
2 1/4 c milk
1 can cream of mushroom soup
Brown sausage, drain and set aside. While sausage is browning tear the loaf of bread into bite size pieces and place in a GREASED 9x13 pan. In a bowl, mix milk and eggs together.
Top the bread with the browned sausage. Then add the shredded cheese. Pour the egg/milk mixture over top. Add the cream of mushroom soup on top (I use a bit more milk to make the soup a bit thinner so it spreads easier).
Bake at 350 for 45 minutes to 1 hour. The edges will be bubbly when it is finished.
From Frozen: Thaw first then bake as directed above.
I hope you enjoy this recipe as much as we do!
<3 Alison
Subscribe to:
Posts (Atom)